Upload and install the Alphashare Webkit
Request the latest WebKit version from support@alphashare.com and save it somewhere where you can find it later.
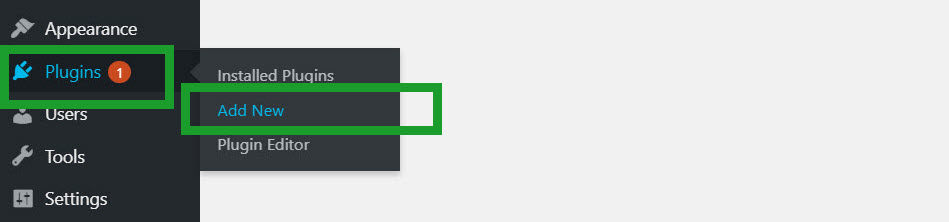
Login to your wordpress installation and on the left hand menu hover over plugins and select “Add New” (or you can click “Plugins” wait for the new menu to load then click “Add New”)
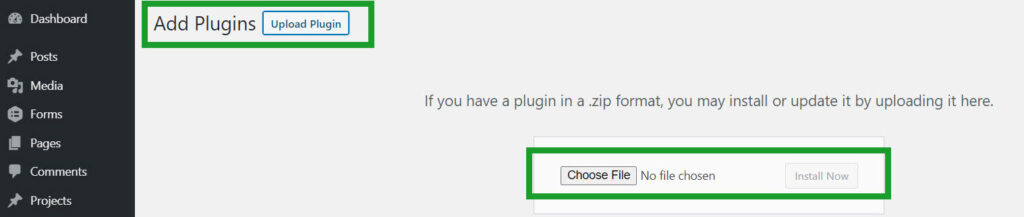
At the top of the new page choose “Upload Plugin” then “Choose file”
Find the file on you computer then “Install Now”
Alphashare webkit settings
Once installed activate the plugin and go to Alphashare Webkit under the settings menu.
Your Alphashare representative will give you a License Key and Member Account number enter these and your website name in to the relevant fields at the top of the settings page and click save at the bottom of the page.

You need to make pages for the Alphashare webkit to use for showing the property search page, search results, property details and shortlist. You can name these as you want.
Import Server Data
Near the bottom of the settings page you need to import your properties.
First click “Import Location Hierarchy” This will import all the locations from your account, this might take a few minutes depending on how many properties you have, these will be used in the search form plus added to all your edit page, pages so you can show featured properties and results from specific locations on an area page .
Next import your property type and features.

Once done click Save Changes at the bottom of the page.
Make Alphashare Webkit pages
Make the following pages and place the following shortcodes into the pages:
Property Page (Property details page):
Property Search (Property Search form page):
Search Results (Search results page):
Shortlist (A page to view the users liked properties):
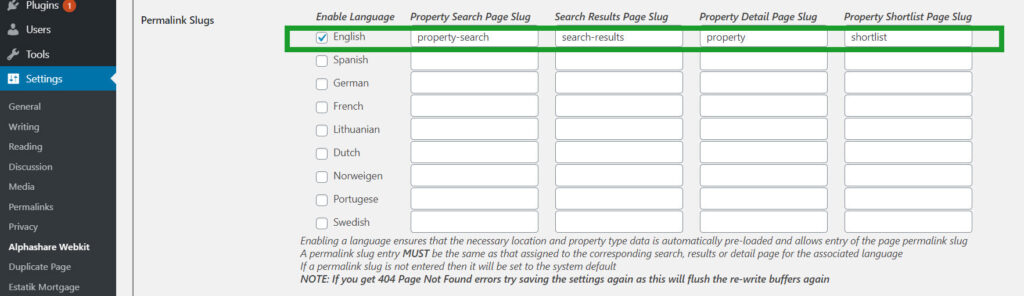
Back on the Webkit settings page enter your page permalinks in to the relevant Permalink Slugs.
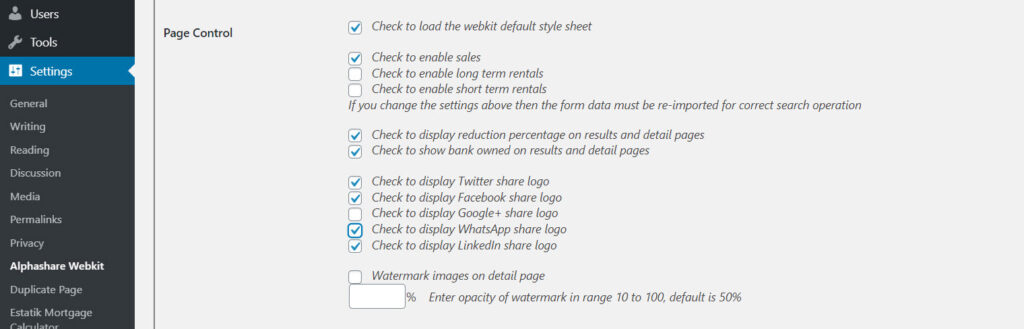
Page Control
Select load the default style sheet, enable sales and FotoRama, select the following settings where relevant:
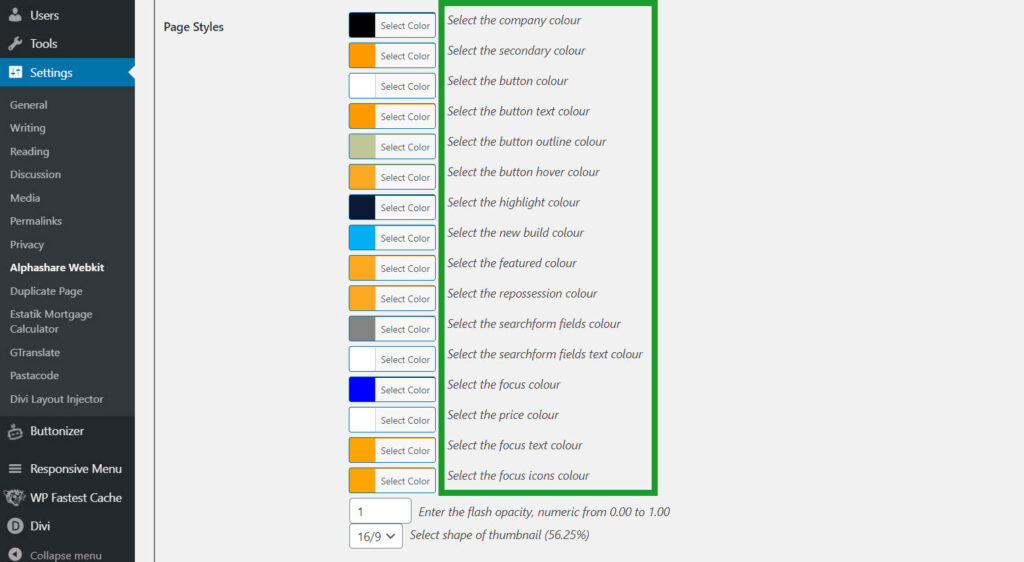
Page Styles
Change the page styles inline with your WordPress Theme.
Print Page
For the Print Page function on the property details pages to work you need to download the “Popup Maker” plugin.
Once installed add a popup called “alpha-print” with the following shortcode entered:

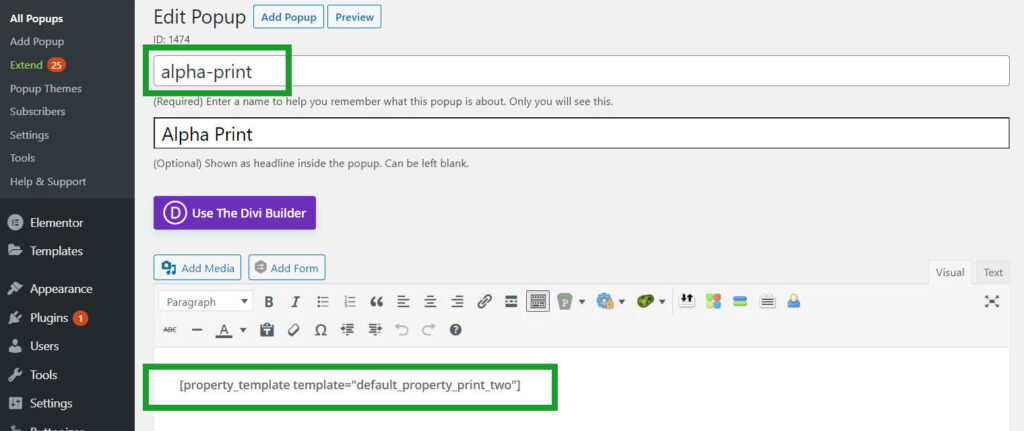
Go down to “Popup Settings” and change the “Display” “Size” “Max Width” to 800px
After saving this popup go down to “Popup Themes” and either make a new theme and assign it to the alpha-print popup or change the default to the following settings.
Overlay Settings Color to #000000 (black) and Opacity to 50%.
Change Background Color to white (#ffffff)
Finally
Change your Permalinks in WordPress to Post Name.
You should now have a working webkit.
We have made a lot of templates for your convenience to show the search form, results, featured properties and property detail pages, which you are currently using with the installation we have just done.
You can use a different template by changing the template name in the shortcodes you have just entered.
There is a list of current templates Here plus you can make your own pages up using our shortcodes which can be found on the following links: